Automatic concealed cistern is clean and easy to use. But when you receive Rajeyn’s sensor concealed cistern, how you should install the flush system? Today we will introduce the detailed introduction of concealed cistern sensor plate.
Firstly of all, you need to know the basin technical information or parameters of the concealed cistern flush system. Details are as below.
| Standby current | <30uA |
| Instant current | <180mA |
| Sensor range | 40-65cm for human body |
| Flush time | Using time <90s, half flush
Using time>90s, full flush |
| Dimension | 246*158*14.5mm |
| Power supply | DC6V/4 pieces AA alkaline batteries
AC100-240V-DC6V transformer |
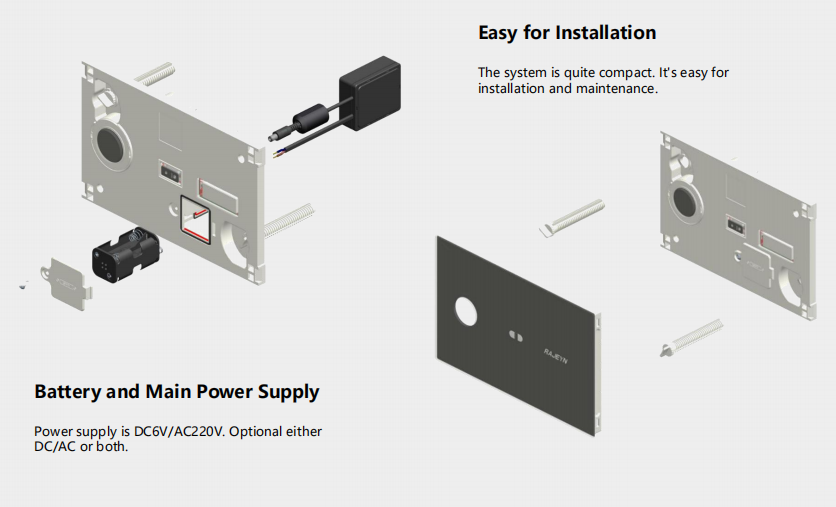
How to install the sensor plate? After completing the water tank cistern installation and wall treatment, you should remove the protecting cover from the water tank. Then cut the protecting frame to the level of the wall with a knife. Again, clockwise rotate the valve handle in the cistern to open the angle valve. Finally connect the DC connector with magnetic ring of the transformer to the DC base at the back of the control plate.
After that you need to connect the air tube between sensor plate and flush valve. You will notice that there are remarks at the back of the sensor plate showing full flush and half flush. Make sure that the air tubes are connected correctly based on full and half flush needed. Important is that the manual push button is defaulted connected to the full flush. You can change to half flush if needed. At the same time, it’s easy to connect air tube since all connections are with push-fit quick connectors. It’s quite convenient to take out of the air tubes. You just need to push the connector and pull the air tube out.
Now it’s time to fix the sensor plate (without tempered glass kit). Fix the control plate to the water tank with two long plastic screws. Install 4 pieces AA alkaline batteries to the battery pack. Finally fix the tempered glass plate to the sensor plate with four snap joints. The installation of the concealed cistern sensor plate is completed.